Wednesday, May 28, 2014

DIY Blanket Ladder- Part 2

I have finally completed the blanket ladder that was built for the nursery!

You can see part 1 of the building process here.


The first thing I did to have it nursery ready was take a paint brush and some white colored Kilz paint to have a good base coat. 

This is a primer, sealer, and stain blocker. It resists mold and mildew growth, and seals porous surfaces for better paint coverage.


Then, I took white spray paint for my main coat.


I wanted it to have a used, vintage, and distressed look to it as well.

I used my electric sander and roughed up the edges and areas that would get a lot of wear and tear for a more appealing look.


I love the way it turned out!

The first blanket was a gift that my mother-in-law bought her in Ireland, the middle one I bought her at Home Goods (love that place), and the last one was a gift from my mother-in-law too when she went to Hawaii! :)

 Since this photo has been taken, it is now hold many more blankets to keep my baby warm, or as a play mat for tummy time! 

I am loving the use for this ladder and the way it looks in her room!
What do you think of the final results?

xoxo,
Jen


Wednesday, May 21, 2014

Vintage Baby Rocking Horse

I once shared a vintage baby rocker that belonged to Jake when he was little! 

This rocking horse is another piece that belonged to Jake; we are happy that it was saved for our sweet Emma! 


As you can tell, he is missing several parts and pieces, and needs a little TLC! 

Since he only had one ear, I started by taking that off and using it as a template to provide him with two new ones.


I folded these two ears in half and stapled them to the head of the rocking horse with a staple gun so that the open flaps were facing outward.

I used leftover scraps of the leather piece to replace the rocking horse's nose strap that was falling off and stapled that to him as well.

Then, I stained the 8 little wooden button caps with a Golden Pecan Wood Finish stain by Minwax. 

I used these to recover the screws that were being shown at the bottom of the rocking horse.


Here are the 8 caps stained and ready for glue.


I used Krazy Glue to attach them to the rocking horse over the screws.


Then, I used the same color stain on the larger wooden button caps that would be used to cover screws on the seat of the horse, and to the wooden dowel rod that would be used to replace the missing handle. 

Here he is with new life! ;)


He still has is wear and tear scratches, but that's just because he was loved so much by his original rider. 
Now he is set for a new one!

Isn't he just precious?!

xoxo,
Jen


Thursday, May 15, 2014

Grungy Grout Gone!

Ever since we moved into our house I despised looking at our tile grout. It was so grungy, dirty, and dark looking.

Notice how I said "was", that's past tense! :) 

That's because I took a trip to Lowe's and bought a
bottle of grout renewal for only $12.


They sell it in several different shades, but I bought it in white.

Here is a before picture of what the guest bath looked like and what I was dealing with. 
This is how it looks, if not worse, anywhere in the house where there is tile.
Gross right?!


Before you begin, sweep your floors free of dirt, hair, and dust!

>> This bottle goes a L O N G way. <<

All I used is a little dot (or two) for one line of grout.


Next, I used a toothbrush to spread it out evenly across the line.


Then, I took a damp paper towel and used the tip of my finger to touch up along the edges where it got on the tile. 

I let it dry over night, then cleaned my floors, and stared at them in amazement!


Isn't this product just fabulous?...and such a cheap fix!

What do you think of the difference!

PS: Sorry for the poor picture quality

xoxo,
Jen

Wednesday, May 14, 2014

A small change that can make a big difference

One word, curtains!

I was on the hunt for the perfect curtains for Emma's room and of course I found them at the one and only, Target! 

Curtains are something that are so simple, but make a huge impact on a room!

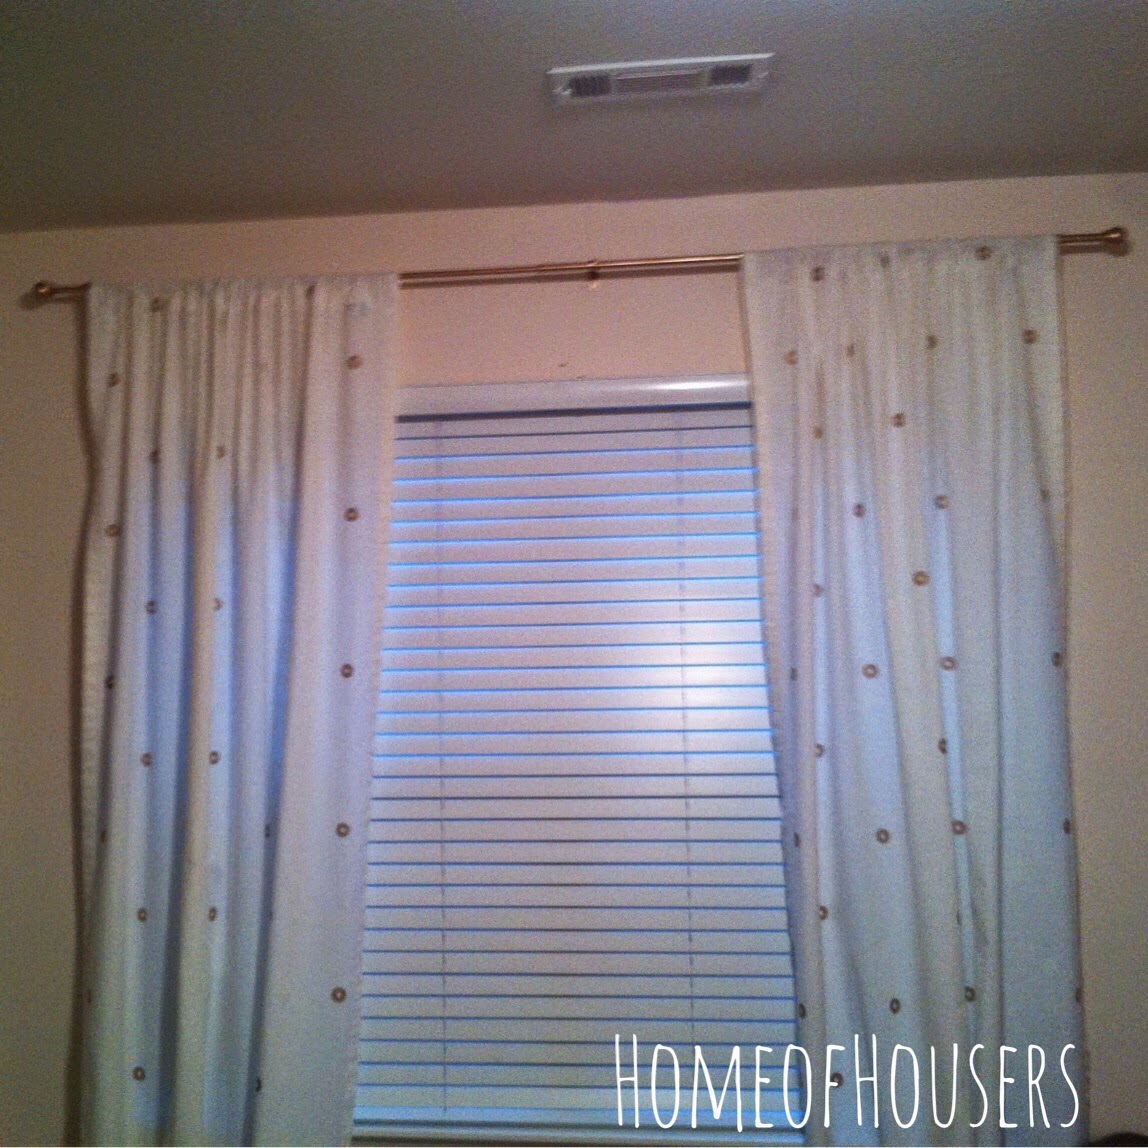
Here is a before picture showing the boringness in the room with the lack of curtains.


I read that if you hang your curtains high and wide, it will provide the illusion that your windows are much wider and that the room has higher ceilings. 

We hung the curtain rod, 6" down from the ceiling


And voila, here is the fabulous after shot of these gorgeous curtains perfect for my Emma's room!


With a gold rod to match. ;)


I am so utterly pleased with them, the way they look, and how they provide such a big impact on her room!

If you like them as much as me, click here to purchase!
They are the Nate Berkus metallic window panels

What do you think of them and the difference?

xoxo,
Jen


Tuesday, May 13, 2014

Top Ten Tuesday: Uses for Baking Soda

I know, It sounds weird, a blog post with the focus on baking soda. 

Let me preface with the fact that this product is amazing and I am going to share with you why in these top ten uses for it! 

Baking Soda is an environmentally friendly product and a natural neutralizer.


1. With it being sunburn season again, I thought this first use would be appreciated. Soothe your sunburn by soaking in a lukewarm bath with a generous amount of baking soda (about half the box). 

2. It can be used for an all purpose cleaner with Dawn dish soap and vinegar.

3. Cooking purposes, obviously.

4. In the kitchen, every refrigerator and freezer can benefit from an open box of baking soda in it to protect itself from unwanted odors.

5. As a glass stove top clean up, use baking soda and water in a solution or paste and you will keep the original finish.

6. Dealing with pet accidents of any form is no fun. My husband and I would be the first to tell you how much baking soda benefited us while living in a tiny loft in downtown Chattanooga with a claustrophobic lab (I diagnosed her myself). 
Cover the infected area with baking soda, let it sit for awhile and it will not only help to remove the stain by soaking up the moisture, but the odor as well!

7. For laundry purposes, baking soda will help you rid of dirt, grime, and unwanted odors from soiled clothing and household linens. It will help whiten, brighten, and freshen. 

8. Keep your hands soft by sprinkling baking soda in dish water when washing the dishes.

9. This product can be used for immediate relief from a bee sting or bug bite by making a paste and patting it on the infected area. 
PS: When removing a bee/wasp stinger, always scrap it out with something such as a credit card, don't pluck it out because you may leave some behind.

10. When washing new baby clothes to remove any chemical finishes, wash them in a mild soap and 1/2 cup of baking soda. 

This is only TEN reasons people, this product can be used for so much more!

Do you have any tips and tricks for baking soda that you would like to share?

xoxo,
Jen

Friday, May 9, 2014

DIY Blanket Ladder

This fun DIY project was completed for the nursery, and I'll share it in two posts!

While spending time at my in-laws, my awesome hubby and father-in-law built me this amazing ladder to lean against the wall with the multi-purpose use of decoration  and holding baby blankets! 

I saw it on Pinterest here and the plans that she provided were very similar to what we did as well, and by "we" I mean Jake and his dad! ;)

First, they started with a single CCA treated pine 12' 2x8 board.


5' was measured off and then they cut that into a 2x4 for the legs of the ladder.

Here you can see the two legs and a step being cut down to size

Next, out of the remaining piece of wood, 4 slats (17" across) were cut out to use as the steps of the ladder.


Sanding was the next step.

Once all the sides and edges were cleaned up and smooth, they began to screw it together.

This is where our biggest difference is compared to the one on Pinterest.
We did not use pocket hole screws. Instead, we used what was on hand, and used 
3" High Performance Exterior Screws.


The first step at the top of the ladder was screwed in 3" from the top.

From there, each step was screwed in 12" apart from each other. 

After all four of the steps were screwed in, an angle of about 25 degrees was cut at the bottom of the legs to better support the lean against the wall. 


The best part....
not a single dime was spent to create this wonderful little DIY project.
The piece of wood was left at my in-laws house from when they bought it, and the screws and tools were all on hand already as well. 

I say, "A job well done and time well spent!" :)


There she is in all her glory!
Looks great, right?!

In the next post, I will share the finishing touches and the final look after a coat of paint! 

xoxo,
Jen

Thursday, May 8, 2014

DIY Alphabet Craft

I have been having a great time preparing the nursery for Emma's arrival! I have been getting really pinspired too, that's short for "Pinterest inspired" of course! ;) 

Recently, I saw ABC cards strung within a frame in the background of this photo and loved it!


My blogger and media friend, Brittani, over at Linen and Lace completed a similar project and sent me this free set of antique ABC cards that she found here.

I finally put myself to work 
and completed this simple craft project for our baby girl.

To complete this project, you will need the following items:


- an empty frame (I used the frame of an old window)
- small sized clothes pins
- hot glue gun
- twine
- scissors

First, I measure the distance that I would need my twine to string on my window frame and cut out 5 strands.

Next, I turned the frame over to the backside and used the hot glue gun to secure each side of the twine to the frame. While completing this step, I measure the distance between each strand of twine with the distance of an ABC card so that I knew I would have enough room for all of them.

I repeated this until all of the strands of twine were glued to the window frame. 

Then, I took my small sized clothes pins and the ABC cards and attached them to the twine.


TA-DA! The project is complete! 
It's that simple! :)


I love the classic ABC's posted in the nursery with the mix of an antique feel!

What do you think?

xoxo,
Jen