Sunday, April 12, 2015

DIY Orb Pendant Light

If you have never seen the HGTV show, Fixer Upper, you need to add that to your 
To-Do list. I love that show! The couple, Chip and Joanna Gaines, are so cute and fun to watch, and I just love her style!!
http://magnoliahomes.net/

With that said, I swoon over these orb lights that she uses!

link
I have seen them for sale for a couple hundred dollars, but that was not currently in my budget. 

I recently found this orb item at Home Goods for only $25 (say whhaaa!!) and knew that I had to buy it, especially when I received confirmation from a friend that I could DIY this baby into a my own pendant light! 


All it had was a short chain attached; I'm not sure what it's original purpose was other than a DIY project. 

I took it home and my amazing husband took off the chain and attachment from the orb. After doing this, it left a hole which we would use to secure the light fixture kit. 

I ordered a pendant light kit from World Market.

Then, my husband used his welding machine to weld it back together!

I spray painted it a metallic black color, added an Edison Bulb, my husband hung it up, and VOILA!


I love the look I got for such a cheap price too!

What do you think?!


xoxo,
Jen


Wednesday, February 25, 2015

Painting Kitchen Cabinets

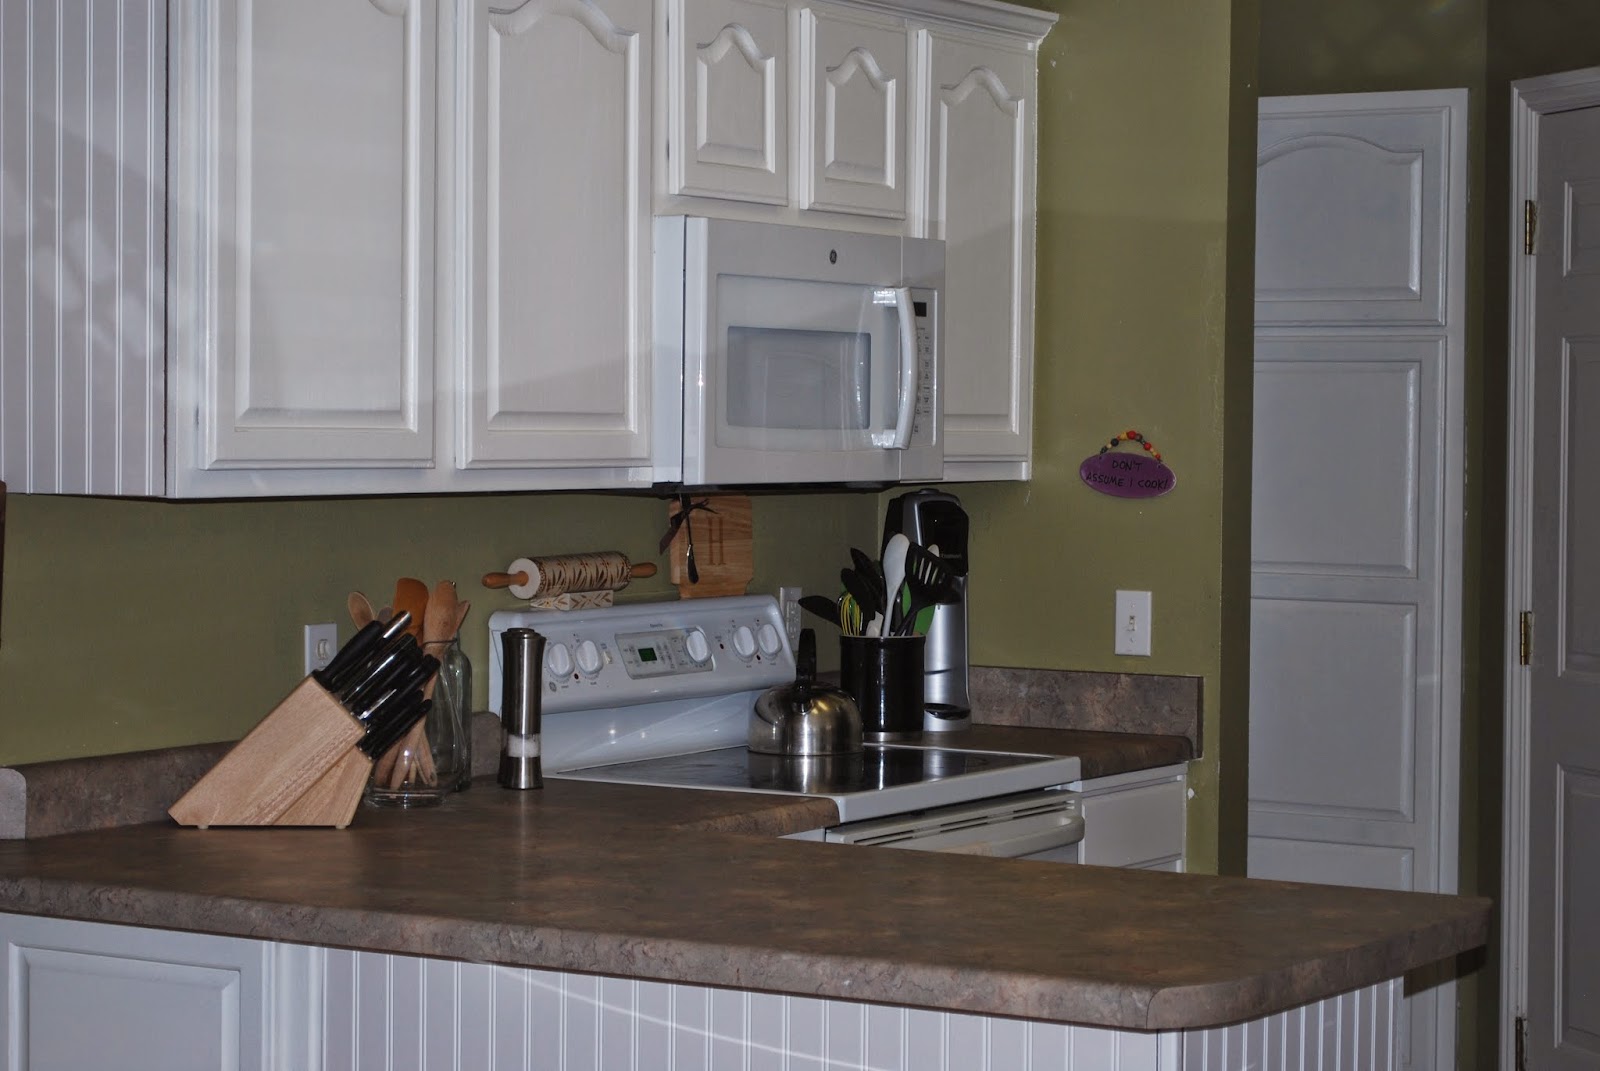
We have officially completed the biggest DIY project that we've done yet and  painted our kitchen cabinets! We also added beadboard to all of the side paneling which really adds character to the kitchen and completes the whole thing!

I may or may not have thrown a tantrum or two while doing this, and there was a point where I questioned why I thought I could do this, but let me tell you, there is a light at the end of the tunnel and you can do it too! 

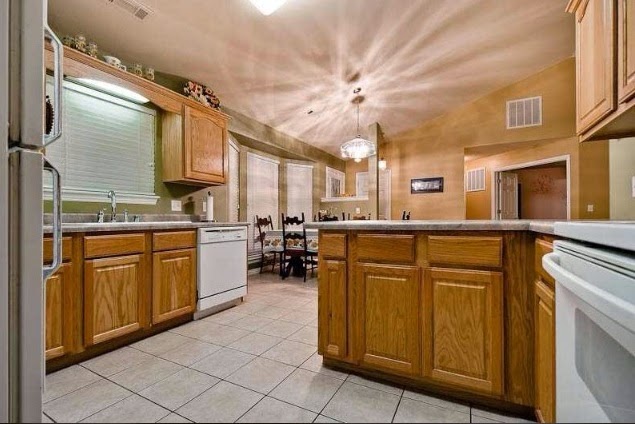
First, let me show you some before pictures.

These pictures are from the listing when we bought the house. 


Now for the revealing...


I did a lot of research before I started and everything said that you MUST sand first. After actually completing the task myself, I will also say that you MUST sand your cabinets. There is a polyurethane film that covers them and will prevent the paint from sticking.


After sanding, be sure to clean them really well of dirt, dust, grime, and any other unwanted grossness that may have been sticking to your cabinets.


Finally, priming. We primed really heavily. 

After you prime, paint.


We used Valspar Ultra semi-gloss Bistro White.


I didn't take any during pictures because the whole process is just something that you can't really see the stages of through a lens. 


This was A LOT of work, but totally worth it! I love the difference! 
Let's look again! :)


What do you think?
Have you ever completed a DYI this big? 
I would love to hear from you!

We have several more things to update and renovate in the kitchen, and although it all won't happen over night, I will keep you updated throughout the fun process, so stay tuned! :)

Coming up:
Paint kitchen walls
Change lighting in kitchen and dining
Add pendant above sink
Add cabinet pulls and knobs
New sink
New countertops 
New backsplash
New fridge


 xoxo,
Jen


Tuesday, February 10, 2015

Nursery Reveal


With Emma being 6 months old, and time passing by so fast, I feel like I should reveal her nursery to you before she grows up and moves out on us!

I finished it before she was born and have been meaning to share it with you, but just haven't taken the time to snap some photos.

Let me preface with the fact that I imagined a girly room that didn't have "baby" written all over it. I wanted something that she could grow up in {with soft colors and gold accents}. :)

We painted the walls a soft peach color, which I shared with you here.

A lot of her decor items were either vintage items from within the family, a DIY, or found at Target or TJMaxx. 
I will share a list down below.


My amazing friend created this amazing piece and
you can check out her Etsy shop here.


I used a jar for pacifier storage


You can see the rehab of this antique dresser here.


I removed closet doors for more space with the cupboard. 

I also labeled three baskets for storage
1. Too Small
2. Nursing Essentials
3. Hats


Gold "E": Hobby Lobby
"Quite Fawnd Of You My Deer" picture: DIY
Mint green & gold scripture painting: handmade gift
Dandelion Window: handmade gift
Curtains: Target
Glider: Target
Crib of blanket: TJMaxx
White frame: TJMaxx
Wire basket: TJMaxx
Peter Rabbit plates: family item

The blanket ladder was a DIY.
 The rocking horse and the vintage baby rocker was my husband's when he was little. 
The old window frame with the alphabet letters was a DIY.

The vintage scale is a family item that my father-in-law was actually weighed on as a baby and we used it as a prop during newborn and materinty photos.

 There you have it! 
What do you think? 

I am happy with the results! :)

xoxo,
Jen

Friday, December 12, 2014

Cabinet Chalkboard

I recently completed our first DIY project in the kitchen.

If you follow me on Instagram, you saw that I posted this sneak-peek photo.


Ever since we first decided that we were going to buy this house, I imagined this little section of our kitchen cabinets as a chalkboard.


This little DIY didn't take long at all! 

First, I wiped it down with a vinegar and water mixture to get rid of any dirt and grime that may be on it. Then, I did a light sanding, which probably wasn't even all that necessary. 


After sanding it down, I vacuumed up all the dust and wiped it down again.

Knowing that we plan on painting all of our kitchen cabinets [and the walls], I taped off anything I didn't want to become a part of my new chalkboard.
< I somehow lost the pictures of what I taped off  >


I used a small foam roller brush for the main surface, and a small paint brush to get into the tiny crevices and corners. 


I painted two coats of the chalkboard paint, and had to let it set for 7 days before I could write anything on it.


------- LONGEST  S E V E N  DAYS  EVERRR  ------


Totally worth the wait to do something the correct way.


I love our new cabinet chalkboard.

We have already used it so much when making lists for our trips, and it's so handy! 

What do you think of it?

xoxo,
Jen


Tuesday, November 25, 2014

Fall Mantle

As I've said before, I love fall, it's my favorite season, but I feel like it was too short! We have just had our first snow of the season and it's not even winter yet!

With Thanksgiving this week and Christmas around the corner, and changing out the decor for it soon, I figured that I should finally share the fall mantle before I take it down.

Where did the time go!?


I decorated our mantle using the painted pumpkins that I shared with you here.


Those twig pumpkins were only $3.00 in the dollar section at 
Target...Score!
The brown and yellow ones were a gift from my MIL that she got from TJMaxx.


I easily made the leaf banner using fake leaves {that I spray painted gold}, twine, and miniature size clothes pins...super easy!


What do you think?
Did you decorate you mantle for the fall season as well?

xoxo,
Jen

Monday, November 17, 2014

Once Upon A Lamp

I'm not happy with the current situation of our guest room/office space, and although I have somewhat of an idea in my head of what I want it to look like, the struggle is real.

One step at a time though.

There's this lamp on the nightstand that I just wasn't pleased with anymore, but I didn't particularly want to get rid of it either; I loved the shape, and as my husband would say, there's nothing wrong with it. 

On the contrary, with the help of my favorite DIY partner, the rehab was simple.


I used the fabulous Rust-Oleum metallic black spray paint.


Here is the lamp as it was...a little too silver-y. I wasn't fond of the two-tone colors that the black leather band offered.


I taped off the leather band and spray painted the rest of it.


I love the darkened appeal to it now with the metallic finish and in one full color.


I'm hoping simple changes like this will eventually make a big impact as I slowly transform this room.


xoxo,
Jen