Friday, May 9, 2014

DIY Blanket Ladder

This fun DIY project was completed for the nursery, and I'll share it in two posts!

While spending time at my in-laws, my awesome hubby and father-in-law built me this amazing ladder to lean against the wall with the multi-purpose use of decoration  and holding baby blankets! 

I saw it on Pinterest here and the plans that she provided were very similar to what we did as well, and by "we" I mean Jake and his dad! ;)

First, they started with a single CCA treated pine 12' 2x8 board.


5' was measured off and then they cut that into a 2x4 for the legs of the ladder.

Here you can see the two legs and a step being cut down to size

Next, out of the remaining piece of wood, 4 slats (17" across) were cut out to use as the steps of the ladder.


Sanding was the next step.

Once all the sides and edges were cleaned up and smooth, they began to screw it together.

This is where our biggest difference is compared to the one on Pinterest.
We did not use pocket hole screws. Instead, we used what was on hand, and used 
3" High Performance Exterior Screws.


The first step at the top of the ladder was screwed in 3" from the top.

From there, each step was screwed in 12" apart from each other. 

After all four of the steps were screwed in, an angle of about 25 degrees was cut at the bottom of the legs to better support the lean against the wall. 


The best part....
not a single dime was spent to create this wonderful little DIY project.
The piece of wood was left at my in-laws house from when they bought it, and the screws and tools were all on hand already as well. 

I say, "A job well done and time well spent!" :)


There she is in all her glory!
Looks great, right?!

In the next post, I will share the finishing touches and the final look after a coat of paint! 

xoxo,
Jen

Thursday, May 8, 2014

DIY Alphabet Craft

I have been having a great time preparing the nursery for Emma's arrival! I have been getting really pinspired too, that's short for "Pinterest inspired" of course! ;) 

Recently, I saw ABC cards strung within a frame in the background of this photo and loved it!


My blogger and media friend, Brittani, over at Linen and Lace completed a similar project and sent me this free set of antique ABC cards that she found here.

I finally put myself to work 
and completed this simple craft project for our baby girl.

To complete this project, you will need the following items:


- an empty frame (I used the frame of an old window)
- small sized clothes pins
- hot glue gun
- twine
- scissors

First, I measure the distance that I would need my twine to string on my window frame and cut out 5 strands.

Next, I turned the frame over to the backside and used the hot glue gun to secure each side of the twine to the frame. While completing this step, I measure the distance between each strand of twine with the distance of an ABC card so that I knew I would have enough room for all of them.

I repeated this until all of the strands of twine were glued to the window frame. 

Then, I took my small sized clothes pins and the ABC cards and attached them to the twine.


TA-DA! The project is complete! 
It's that simple! :)


I love the classic ABC's posted in the nursery with the mix of an antique feel!

What do you think?

xoxo,
Jen


Monday, May 5, 2014

Top Ten Tuesday: Kitchen Series

It's Tuesday again! :)

With the paint still sitting in our garage that is supposed to be the new color on our kitchen walls I decided to dedicate this weeks TTT to kitchens.

Here is a look at my personal Top Ten Kitchens that I may or may not drool over. ;)

1. The backsplash, the window treatment, the farmhouse sink, and that light fixture!

2. Oh my gosh, I just love exposed brick!

3. I love the built-in bookshelf for your cook books, what a great use of space!

4. I adore beadboard, especially in a kitchen!

5. The high ceilings, open shelving, and the large island are a few go-getters for me!

6. What a precious and welcoming cottage feel!

7. Painting the backdrop in your glass cabinets for a pop of color...brilliant!

8. Those beams are amazing and those numbered baskets above the cabinets are fairly easy on the eyes too!

9. This two-tone cabinetry is a nice change!

10. This is one of the best representations of dark cabinets with a light counter contrast...well done!

There you have it, this weeks Top Ten Tuesday: Kitchen series!

Which one was your favorite from the top ten?

xoxo,
Jen


Thursday, May 1, 2014

DIY - Nursery Paint Color Reveal

The first DIY project that we took on for our new home was painting the nursery.
I showed you several inspiring nurseries on a Top Ten Tuesday post here,
and I believe that we are well on our way to producing the image that I have created in my head. 

First, let me present to you the before pictures!


I have the cutest, most awesome, loving husband! :)


I love lavender as much as the next person but this was not the appropriate shade, nor did it flatter the walls of this room. Ugh, it just hurts my eyes to look at.

We decided to go with a light shade of peach by Benjamin Moore called Arizona Peach. 


** As I am sure many of you know, the prep work for painting is the worst part, but the most important part. Take the time to tape off all of the trim, the ceiling, and unscrew your light switch and plug-in plates from the wall to keep paint off.

Despite the lack of lighting and the way it presents itself in these pictures, I absolutely love this color and I am so pleased with the way it has turned out. It is the perfect shade of peach for the theme of this room: not too bright, not too light, and a flattering timeless girly appearance. 


This photo is probably the closest resemblance of what it truly looks like in person. 

What do you think of the color change?

I can't wait to show you the future DIY projects of this room as we continue to prepare for our baby girl. :) 

xoxo,
Jen


Sunday, April 27, 2014

Top Ten Tuesday: Baby Must-Haves

Happy Tuesday! 
It has been awhile since I have blogged; where's the time going?!

A couple weeks ago my wonderful hubby and I took a day date trip to Tulsa, OK to register at BuyBuy Baby for our sweet Emma! 


This place is amazing if you have never been, you should stop in if you are ever given the opportunity! It is an offspring of Bed Bath and Beyond (or vise versa, I'm not sure which came first), but anything and everything that you could ever need or want for a baby is here.

Also, BuyBuy Baby accepts 20% off coupons from Bed Bath and Beyond (and have their own as well), you can access any BuyBuy Baby registry at a Bed Bath and Beyond, and they price match!

I'll be honest, I was a little overwhelmed at first. 

For instance, the wall of strollers.


This was the first thing we took on when getting there because we knew it would take us awhile, I mean how can it not, but we believe that we found the perfect one that will suit us and our baby girl. 

Before we headed out for our trip, I began asking around about what the baby 
must-haves are that we should register for and I thought I would share the wealth.

1. Diaper Genie


2. Pack-N-Play 
This is great for traveling purposes.


3. Rock-N-Play Sleeper
Suggested by many.


4. Burp Cloths
You can never have too many.


5. SwaddleMe Blankets


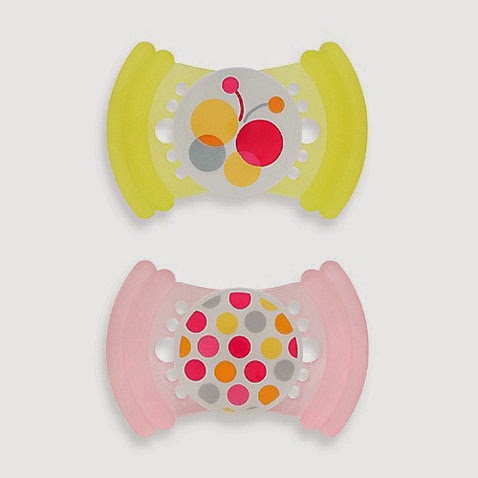
6. Pacifier Variations
Everyone that I talked to recommended registering for a variety of pacifiers because you never know which type your little one will like and take. 


7. Nursing Pillow


8. Breast Pump
All of my mommy friends recommend this brand of a breast pump.
Also, check with your insurance company because according to the new Affordable Care Act that was signed into law in 2010, your insurance may cover the cost of a breast pump for you. ~ You can read more about that at the link provided here.


9. Snot Suckers
Some people suggested the nasal aspirators that the hospital provides (similar to the first photo), and others suggested the NoseFrida. 


10. A stroller with a car seat that fits together
This is the one that we chose.


Well, there you have it, a Top Ten list of baby must-have suggested items. I hope this helps several of you expectant mothers out there as much as it did me. 

What are some of your top ten items for baby must-haves?

Have a great rest of the week!

xoxo,
Jen 


Tuesday, April 8, 2014

Top Ten Tuesday - "Why Pray?"


Happy Tuesday everyone!

For Top Ten Tuesday this week I wanted to share the Top Ten reasons on why to pray. This came from a chapter in a great book that I’m reading called A Woman’s Heart for God by Sheila Cragg.

{Source}

The chapter is entitled, “Why Pray?” and I thought it was a great question to have answered since God knows everything about us; he knows everything we have said and are going to say, so why pray?

These reasons were written by Sheila Cragg and I am just taking parts that spoke to me from her reasons why to share with you.

  1. We pray because Jesus loves us and desires to have a personal; relationship with us – 1 John 4: 9-10
  2. We pray because the Lord wants us to know Him better and love him more. Our love relationship with the Lord changes over time and as we pray and grow in our dependence on Him. Time spent in prayer grows in us the ability to love the Lord with more of our heart, soul, and mind. -  Jeremiah 31:3 and Matthew 22:37
  3. We pray because we need to confess our wrongdoings and our wrong thinking.
  4. We pray because we need the Lord’s guidance and direction in everything we do. He promises to lead us in everything that we do – Isaiah 42:16
  5. We pray because the Lord is our greatest source of help and strength in trying times.  I know that when I have the greatest heartache and feel completely overwhelmed, I recognize my dependence on the Lord more. Sheila writes that the more we share our sorrows with the Lord and seek reassurance found in His word, the more we are aware of His caring presence. – 2 Corinthians 1:3-5
  6. We pray because that is the way to find out how the Lord will provide for our needs and what He wants us to do in the process.
  7. We pray because we need to be changed by the Lord so that we may bring glory to Him. Through prayer, the Lord transforms us by renewing our minds so that we no longer conform to the world’s ways. – Romans 12:2
Our main reason for praying is not to get answers but to know the Lord more personally; to understand and do His will and bring glory to Him.

  1. We pray for ourselves and intercede for others because it is the way we see the Lord at work in our own life as well as other people’s lives.
  2. We pray Scripture because we often don’t know what to pray, but we can present our words to God in His words. – Ephesians 4:22-24, Ezekiel 36:26-27, 2 Chronicles 16:9
  3. We pray because our prayers are precious to the Lord. – Revelation 5:8

Revelation 8:3-4 God reminds us that our prayers matter to Him! J

I highly recommend this book and all that it shares. It is a great reminder of what it looks like to seek God with your whole heart!

I hope you had a terrific Tuesday and that this spoke to you as much as it did me.

xoxo,
Jen

Thursday, April 3, 2014

TV Stand Rehab

So long time no talk! 
Jake and I are now proud homeowners and closed on our house two weeks ago....it has been crazy busy ever since! 

~ Home sweet home ~


Crazy includes the little visit of a plumber to check on the septic tank because our toilet was having issues and overflowing (luckily with clean water) every time the washing machine or dishwasher would be used. Toilet paper was stuck ALL over our bathroom floor for 3 days - I was going insane having to look at it!

In addition to that, after I JUST cleaned out our refrigerator, a coke can exploded inside and caused an extra mess to clean; apparently it was too cold of a setting.
This all happened during our first week in the house; I can't make this stuff up people! haha
Thankfully the plumbing issue wasn't too bad and was easily fixed, but I still have to clean the refrigerator (again).

Anyway, I now have internet access again and I am happy to share a little DIY project that I recently worked on. I decided to work on this old tv stand that Jake and I got when we first got married.

Here is a before picture

I know, pretty dark and boring!
Let me just start with some honesty...this DIY had many fails and was not my most enjoyable project!

I decided to use CeCe Caldwell chalk paint that a friend of mine from Florida over at 
J. Kelly blog introduced me to. 


I got a small sample size in the Vintage White color. I loved the color, not bright white but it wasn't ivory either; the name says it all!
It probably would have been enough to cover my whole project if I didn't have 
fail #1


and spill my paint all over the floor of my garage. Dang!

I finished it off with the same paint and color and touched it up with some white spray paint (fail #2) on the inside when I was beginning to run out; I know, don't judge me. You really cant even tell and it looks so much better! 

Take a look!


Ta Da! 

I left the top the original brown and kept the knobs the same as well! I think that the  Vintage White accent is exactly what this stand needed.

What do you think? Have you been doing any DIY projects lately?

xoxo,
Jen